Monday, February 20, 2012

Bamboo Cutting Board and Howard

I recently got a bamboo cutting board.  It was a switcheroo I had to play when I erroneously bought a an XOXO scale.  That can be a whole 'nother review.  Long story short.  I hated that scale.  My son bought it for me because I just had to have it.  I did all kinds of research and bought it based on reviews.

On to the bamboo cutting board I bought with another kitchen scale when I returned the XOXO scale.  I've had the cutting board for a little while.  I should have bought the condition when I bought the cutting board, but the $50 credit for the first scale was perfect for the new kitchen scale and the cutting board.  I got it from Bed, Bath and Beyond. I'm pretty sure the link is the one I bought.  However, I think I only paid $29.99 for mine.  I love this cutting board.  It's hard enough, but not too heavy to lug around the kitchen.  I read a lot aboutt wooden cutting boards and plastic cutting boards.  The short of that story is wood is still better.  Wood does a better job of healing itself after a cut for a one thing and surprisingly, wood can be much more sanitary.  I'll post some links to my research.

Howard's Butcher Block Conditioner
"Great for bamboo"
Another crummy picture.  I hate my camera.

This is the board with the conditioner on it.
It's on pretty thick.  The directions suggest a warm
application to expedite absorption,  I just squeezed it
there.  It smells a lot like vaseline.  I'm supposed to
leave it on for 30 minute.
  I know I should have taken a picture before the conditioner was applied.  There was a huge difference in the color in just the few weeks to months I've had it.  I highly recommend this process in that the appearance of the cutting board is more appealing alone.  This bottle was something like nine or ten dollars from The Home Depot but it's available in a lot of other places and online.  I'm making a note of the appearance of the board after this first conditioning and will take a picture in one month to see what the difference is.  I'm thinking to myself about the purchase of the bottle of conditioner compared to the purchase of the cutting board.  How many cleanings will I get out of the bottle and how much use will I get out of the board?  I don't know.  Simple math would tell me  I can buy three bottles of the stuff before I've spent more preserving the board than I actually spent on the board.  So here's one board at $29.99 and one application of conditioner.  I guess I will see how many I get out of this first bottle in order to see whether I made a good choice.

Monday, February 13, 2012

Herdin' Up Some Shepherd's Pie

Today I'm making Shepherd's Pie.  Now there's a lot of family controversy surrounding this "one dish" meal.  My sister makes it a certain way, I make it a certain way and as usual, the one who taught us to make it, actually makes it completely different.

Today,  it's more about what I had in the cabinet and refrigerator than how I usually make it.  For us, a couple of things have evolved over the year and the biggest thing for me and my family is FLAVOR.   When I have this entree at my mother's house a generation later, a staple of my childhood seems bland and flavorless.  So, in respect to my mother, as usual, I will give you the "family" recipe and then I'll give you my family's recipe.

So, here's to mom:

1 lb of ground beef
some dehydrated onions
some garlic powder
salt
pepper
instant mashed potatoes
frozen peas

brown the ground beef, put the dehydrated onions, garlic powder, salt and pepper in "to taste".  "To taste" means  there's no real measurement, just sprinkle until it looks good to you.

Make the mashed potatoes per the box or bag instructions

Take an apropriately sized casserole dish and put the meat in the bottom, layer the peas on next and last, the mashed potatoes.  Put the whole thing in the oven long enough to cook the peas which is about 20  - 30 minutes.

So here is where I deviate from the plan a little.  I don't always use beef.  If I'm feeling healthy, I use ground turkey or chicken, both are equally delicious and much better for us than the beef.  But it often depends on what's in the freezer.

Idahoan instant potatoes are about a $1.5 0 a bag.
I keep about a half dozen of these little bags in the
cabinet at all times--usually.  They are easy to
open up and add to the side of just about any entree.
Today, I only had one.  Plain.

I didn'tknow this picture was so blurry.
 I'm too lazy to take another picture.

Birds Eye Vegetables are the only ones I buy.
 I'm sure the house brands are just as good, it's just what I buy.

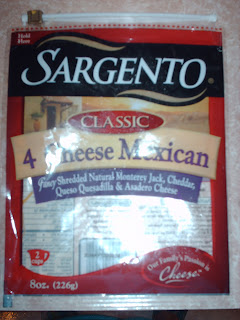
4 Cheese Mexican is just waht happened to be in
the refrigerator, so that's what I'm using.  You can
use whatever.
I use fresh everything, so I use freshly diced onions and garlic and of course I grind the pepper and salt over it.  Not a big difference, but it does improve the taste a little.  For added flavor, I add a can of Hormel Chili with beans to the meat.

I don't always use peas.  Today I'm using mixed vegetable because--again--that's what I had.  I don't recommend broccoli or carrots unless they're canned.  It takes too long to cook those particular vegetables in that way.

Now today I am using a bag of grated Mexican cheeses and I've chosen to layer them on top of the veggies and under the mashed potatoes.  I have also been know to layer the chees on the top and brown it a little, but if the cheese gets too hard, it clumps and you don't get cheese in every bite.

If I'm feeling it on that particule day--not today.  I will make the mashed potatoes from scratch and leave the skins on.  This is not that big of a deal when using red potatoes because the skins are so thin.  Some of the thicker skinned potatoes, it might be a good idea to peel them first.

Today, I am opening up a bag of instant potatoes.  These particular ones come in all flavors, but what happens to be in the cabinet is the plain.  I wish they were flavored, but I think it will be OK.

Put the whole thing in the oven.  I'm going to take some extra time with this to be sure the mixed vegetable cook through, but if I was using peas, it would only be about 20 - 30 minutes.

My sister uses biscuit mix on top of hers instead of mashed potatoes

Monday, February 6, 2012

Feta Cheese Gets Saucy With Peas

I am fairly new to Feta Cheese.  I had a friend over to get to know her new boyfriend.  I had her bring the sald.  When she presented the tub of feta cheese, it was uncharted territory for me.  However, I quickly fell in love with it on my salads and now keep a small bowl of it in the refrigerator at all times.

So some time a few weeks ago I was craving pasta and sauce and did not have any parmesan cheese.  I know, I couldn't believe it either.  However, there was a tub and a half of feta in the 'fridge so I dumped it directly in the sauce and I loved it.  I was so crazy about it, we had the same thing again tonight.

Now I was tired and crabby tonight and I've been known to throw whatever I can think of in a pan of spaghetti sauce, but tonight it was an old favorite swimming with a new friend.  I added a bag of frozen peas and let the whole thing simmer really low--the cheese will stick--while I waited for the pasta to finish.

Oh, here's a tip that not too many think about.  If you want everything to finish at the same time, consider starting the water for the pasta first, then put the meat in the frying pan to brown.

That reminds me of another thing.  Before having spaghetti at my house, my in-laws had never had ground beef in their spaghetti.  I guess up to that point, they'd just opened up a can of Prego and dumped it in the pan.  I will state here that I don't buy Prego.  I buy bottled sauces that do not contain sugar.  Most of those tend to be imported and are a little bit expensive, so when they go on sale, I normally buy about six bottles and that will carry me through to the next sale.  Two brands I have found that do not have sugar in them are Gia Russa and Victoria.

Monday, January 30, 2012

Cleaning Up George's Act

Warning and Disclaimer:  This is a dangerous way to clean your grill.  It creates large amounts of steam that can burn you very quickly.  Please use caution when using this advice.  I do not take any responsiblity for anyone's accidents related to this blog, so don't try to sue me for something I didn't make you do.

A few years ago my son got us a Geoge Foreman grill.  We love this grill.  We probably use it four to six times a week.  Highly possibly considering there are 21 meals in a day.

However, I fell quickly out of love with the grill when I had to clean it.  Anything other than sandwiches and it was days before I wanted to use it again because it was so difficult to clean.  However, I am here to testify that I am back in love with my grill.

Why?

Because I figured out how to clean it!

I remembered back to working at McDonald's and how we used to periodically throughout the day clean those big nasty grills and then at the end of the day how we'd clean them again.  Are you ready for this?

WATER.

We used water.  At the restaurant we poured the water right on the the grill and had big blades that we pushed the steamy (dangerous) mixture off the end into the trap.  The grill were so clean they stuck for a few cycles of burgers and all we used was water.

I decided to try the same with the grill.  At first I drug the HOT grill to the sink and sprayed it with the hose.  That worked but was dangerous and messier than scrubbing.  Then I got squirt bottle full of water and with it plugged in raised the lid about 1/2 way and squirted the lower plate and found that the steam rose up to the upper plate.

The baked on cooked on mess that I had spent so much time scrubbing boiled to the top of the steam and as soon as the grill was cool enough to tough handle I took it over to the sink and wiped it down.

I've done this quite a few times now and there has been a few times when I need to rub a spot here or there, but I have never had to scrub the grill again.  This has made me infinitely happy because I am so crazy about this grill.  We are back using again as often as before.  I will use this grill until it wears out or burns up.  Then I will probably get the one with the removal plates, but I will still use the steam method I learned 20 years ago at McDonald's.

I repeate this method creates a great deal of very dangerous steam and would hope that you would use caution when using my advice.  I do not take responsiblity for any injury created by this blog.

Monday, January 23, 2012

Brownies -- Not From a Box

I got this recipe back in 1984.  It wasn't the best of times, but I did manage to get a decent recipe out of it from a very good friend of my mother's.  When I made the recipe the first time, it tasted a little gross, so over the years I've added some of my own details to it and it's a little healthier, and a whole lot tastier!

For reasons I would only tell my therapist, I lived with the lady I got this recipe from in 1983 I believe it was.  She had four great kids that I still keep in touch with on Facebook.  With that many kids, the odds are against us, but is seems like they have all turned out to be functioning adults which is more than I can say for myself at times.  I'll give you her recipe first and then I will give you my changes.

1 stick of margarine
2 oz bittersweet chocolate or 7 heaping tablespoons of Baker's Cocoa
1 cup of sugar
2 eggs
1 tsp vanilla
3/4 cups flour
1/2 - 3/4 C nuts


This is the actual photo of the recipe from the album.
 I think I made this up in 1987.
Here is what I did with the recipe over the year:

1/2 C Coconut Oil
7 heaping tblsp Hershey's Special Dark Cocoa
3/4 C Organic Agave Nectar
3 large eggs
2 tsp some kind of Liqeuer
3/4 cups of all purpose flour
1 Pouch of hot cocoa -- favorite flavor "raspberry"
3/4 C nuts
This is what I use for my substitutions. 
You can make the original if you want.
Cream coconut oil, cocoa and nectar together.  Add eggs and liqueuer.  Beat.  Add flour, nuts, mix.  Bake at 350 degrees 20 - 25 mins.  Remove before done.

Removing the brownies before they are done is a little of what makes them moist and delicious.  The flour to egg ratio and the all-purpose flour make the brownies like brownies and not like chocolate cake.  Removing them before they are done allows them not to over cook.  I can't think of anyone I know that likes crunchy brownies.  Not to mention hard brownies.

I got a "newsletter" the other day from the lady that gave me this recipe.  She made it up on her computer with digital photos and a cute font.  I'm sure she believes she is being quite saavy with her digital camera and computer.  I wish she'd just attach the letter to an e-mail so I don't feel so guilty about not reading it and wasting the paper.

Monday, January 16, 2012

A New Home for Some Old Tricks

I'm in the process of moving Kitchen Traditions here.  It may take a while to get everything situated, but soon everything will be updated regularly.

Check back here regularly.  http://andsawmyself.blogspot.com